Skull Crusher: The Ultimate Guide
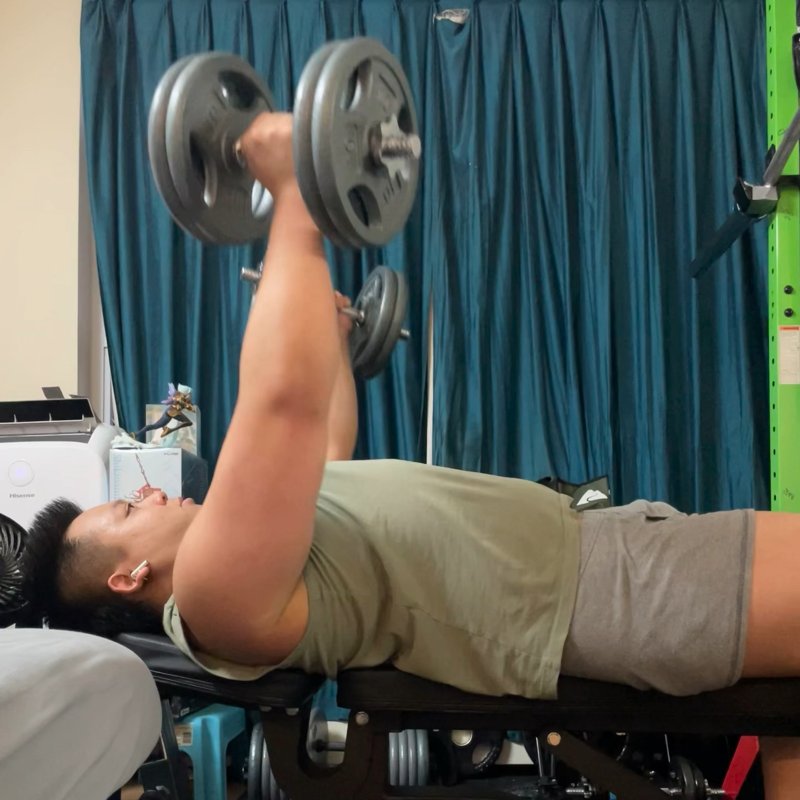
The Skull Crusher is an isolation exercise that targets the triceps brachii by extending the elbows while lying on a bench with weight held above the face, creating an intense contraction in the three-headed arm muscle.

Quick Facts
Key Benefit
Targeted triceps development and elbow extension strength
Primary Muscles
Triceps
Secondary Muscles
Abdominals, Anterior Deltoids, Forearms, Pectoralis Major
Equipment
barbell, flat bench
Difficulty
Intermediate
Type
Strength
In This Guide
Ready to master the Skull Crusher?
Track your progress, see improvements over time, and build strength consistently.
Download GravitusThe Skull Crusher, also known as the lying triceps extension, is one of the most effective exercises for isolating and developing the triceps brachii—the three-headed muscle that comprises approximately two-thirds of your upper arm mass. Its ominous name comes from the movement pattern where weights are lowered toward the forehead, requiring precise control to avoid the implied consequence.
What makes this exercise particularly valuable is its ability to target all three heads of the triceps, with special emphasis on the long head, which is often underdeveloped in lifters who focus primarily on pressing movements. The supine position and movement mechanics create an optimal stimulus for triceps growth and strength development that complements compound pressing exercises like bench press and overhead press.
Beyond aesthetic benefits, developing strong triceps through targeted exercises like the Skull Crusher contributes significantly to your performance in all pressing movements. Since the triceps are responsible for elbow extension—a key component in exercises from push-ups to bench press—strengthening them directly can help break through plateaus in these compound movements.
Whether you're looking to add dimension to your arms, increase your pressing strength, or simply develop more functional upper body power, the Skull Crusher offers an efficient and effective path toward these goals. When performed with proper technique and appropriate loading, it provides a unique stimulus that few other exercises can match.
Benefits of Skull Crushers
The Skull Crusher offers several unique advantages that make it a valuable addition to any arm training program.
Complete Triceps Development
Effectively targets all three heads of the triceps muscle, with particular emphasis on the long head, creating balanced arm development.
Strength Carryover
Directly improves elbow extension strength, which carries over to all pressing movements like bench press, overhead press, and push-ups.
Muscle Isolation
Minimizes the involvement of other muscle groups, allowing for focused triceps training without significant assistance from shoulders or chest.
Joint-Friendly Loading
The supine position on a bench provides stability and support, potentially allowing for heavier loading with reduced risk compared to some standing triceps exercises.
Versatility
Can be performed with various implements (barbell, EZ bar, dumbbells) and grip positions to subtly alter muscle emphasis and joint comfort.
Proper Form & Technique
Setup
- Lie on a flat bench with your feet planted firmly on the floor for stability.
- Hold the barbell or EZ bar with a grip slightly narrower than shoulder-width, palms facing away from you (pronated grip).
- Extend your arms fully so the barbell is positioned directly above your shoulders, perpendicular to the floor.
- Keep your upper arms perpendicular to the floor and stationary throughout the exercise.
- Lock your elbows in a fixed position—they should remain pointing toward the ceiling, not flaring outward.
- Begin with your head in a neutral position resting on the bench.
- Engage your core slightly to maintain stability through your torso.
- Ensure your shoulders are down and back, not elevated or hunched forward.
Movement
- Keeping your upper arms stationary and perpendicular to the floor, slowly bend your elbows to lower the weight.
- Control the descent, allowing the weight to lower toward your forehead or slightly above it.
- Continue lowering until your forearms are just past parallel to the floor, creating approximately a 90-degree angle at the elbow.
- Pause briefly at the bottom position to minimize momentum and maximize muscle tension.
- Extend your elbows to push the weight back up to the starting position, focusing on contracting your triceps.
- Maintain complete control throughout the movement, especially during the descent phase.
- Avoid locking out the elbows forcefully at the top position to maintain constant tension on the triceps.
- Exhale during the extension (pushing) phase and inhale during the flexion (lowering) phase.
Key Form Tips
Elbow Position
Keep your elbows pointed toward the ceiling throughout the movement, not allowing them to flare outward or inward.
Upper Arm Stability
Maintain your upper arms perpendicular to the floor throughout the entire exercise to properly isolate the triceps.
Wrist Alignment
Keep your wrists straight and firm throughout the movement, avoiding bending that can lead to discomfort or injury.
Range of Motion
Lower the weight to just above your forehead, not behind your head, which can place excess strain on the shoulders and elbows.
Control Over Weight
Choose a weight that allows for complete control—this exercise requires precision and should never be performed with momentum.
Muscles Worked
Primary Muscles
- triceps: The three-headed muscle on the back of the upper arm consisting of the long head (which crosses both elbow and shoulder joints), lateral head (visible on the outer arm), and medial head (deep inner portion). All three heads are engaged during this exercise, with special emphasis on the long head.
Secondary Muscles
- anconeus: A small muscle near the elbow that assists with elbow extension and stabilization during the movement.
- anterior deltoids: The front shoulder muscle provides minor assistance in stabilizing the upper arm in the perpendicular position.
- pectoralis major: The chest muscle is minimally engaged to help stabilize the upper arm position during proper execution.
- forearms: Activated during gripping and wrist stabilization throughout the movement.
- abdominals: Engage isometrically to maintain proper posture and stability on the bench during the exercise.
Common Mistakes and How to Fix Them
Moving the Upper Arms
Allowing the upper arms to drift forward or backward during the movement, reducing triceps isolation and potentially straining the shoulders. Focus on keeping your upper arms perpendicular to the floor throughout the entire exercise. Consider using a lighter weight until you can maintain this position consistently. If needed, have a training partner gently touch your elbows as a reminder to keep them stationary, or position yourself so you can see your arm position in a mirror.
Lowering Behind the Head
Bringing the weight too far back, beyond the forehead and toward or behind the head, which places excessive strain on the shoulder joints and reduces triceps engagement. Adjust your range of motion to lower the weight to your forehead or slightly above it, not beyond. Focus on creating a 90-degree angle at the elbow joint at the bottom position rather than trying to achieve a more extreme stretch. Consider using an EZ bar if straight bar positioning is contributing to improper range of motion.
Using Momentum
Bouncing the weight at the bottom of the movement or using body momentum to begin the ascent, which reduces muscle activation and increases injury risk. Slow down the entire movement, particularly the lowering (eccentric) phase. Implement a brief pause at the bottom position to eliminate momentum. If controlling the weight is difficult, reduce the load until proper form can be maintained. Consider implementing a specific tempo (e.g., 3 seconds down, 1 second pause, 2 seconds up) to enforce controlled movement.
Flared Elbows
Allowing the elbows to drift outward rather than pointing toward the ceiling, which can reduce triceps activation and place stress on the elbow joints. Focus on maintaining your elbows in a fixed position pointing directly toward the ceiling throughout the entire movement. Slightly narrowing your grip width might help maintain proper elbow position. Consider using an EZ bar rather than a straight barbell, as the angled grips can help maintain more comfortable and stable elbow positioning.
Excessive Weight
Using a load that's too heavy to maintain proper form, leading to compromised technique and potential injury. Select a weight that allows you to complete all repetitions with perfect form, particularly maintaining stationary upper arms and controlled movement. Remember that the Skull Crusher is an isolation exercise where form is particularly crucial—it's better to use a lighter weight with perfect execution than to sacrifice technique for heavier loads. Consider using a weight that allows for 10-12 controlled repetitions before form begins to deteriorate.
Skull Crusher Variations
Equipment Variations
-
EZ Bar Skull Crusher
Using an EZ curl bar with angled grips, which many find more comfortable on the wrists and elbows than a straight barbell.
-
Dumbbell Skull Crusher
Using dumbbells rather than a barbell, allowing for independent arm movement and potentially greater range of motion.
-
Cable Skull Crusher
Performing the movement with a cable and rope attachment while lying on a bench, providing constant tension throughout the range of motion.
-
Smith Machine Skull Crusher
Utilizing a Smith machine for guided movement and reduced stabilization demands, allowing focus solely on triceps activation.
Technical Variations
-
Decline Skull Crusher
Performing the exercise on a decline bench, which changes the angle of resistance and can place greater emphasis on different portions of the triceps.
-
Close-Grip Skull Crusher
Using a very narrow grip to increase the range of motion and potentially emphasize the medial head of the triceps.
-
Reverse-Grip Skull Crusher
Holding the bar with palms facing toward you (supinated), which changes the stress distribution across the triceps heads.
-
Rolling Skull Crusher
Adding a backward "rolling" motion of the bar toward the shoulders at the bottom position, incorporating shoulder flexion for additional triceps long head emphasis.
Frequently Asked Questions
When performed with proper technique and appropriate loading, Skull Crushers can be a safe and effective triceps exercise. However, they do place significant stress on the elbow joint, and improper execution can potentially lead to discomfort or injury for some individuals.
Several factors influence whether Skull Crushers will cause elbow issues for a particular person: Individual anatomy and joint structure—some people simply have elbows that tolerate this movement better than others. Previous injuries or existing conditions like tendinitis can make the exercise more problematic. Exercise technique, particularly maintaining proper elbow position and controlled movement speed. Appropriate weight selection—excessive loading is a primary contributor to elbow problems.
To minimize elbow stress during Skull Crushers, consider these modifications: Use an EZ bar rather than a straight barbell, as the angled grips usually create more comfortable wrist and elbow positioning. Maintain a controlled tempo, especially during the lowering phase, to reduce impact forces on the joint. Experiment with grip width to find the most comfortable position for your individual structure. Consider limiting the range of motion slightly if full range causes discomfort. Ensure adequate warm-up of the elbow joint and triceps before performing the exercise.
If you experience persistent elbow pain during or after Skull Crushers, consider alternative triceps exercises like cable pushdowns, dips, or close-grip bench press that might better suit your individual joint mechanics. Listen to your body—some discomfort during challenging exercise is normal, but sharp or persistent pain indicates a need to modify your approach.
Both implements can be effective, but most lifters find the EZ bar superior for Skull Crushers due to its ergonomic advantages. The choice ultimately depends on your individual comfort, joint mechanics, and specific training goals.
The EZ bar offers several benefits that make it the preferred choice for many: The angled grips create a semi-supinated hand position that typically reduces stress on the wrists and elbows compared to the fully pronated grip of a straight bar. The curved design often allows for more natural elbow tracking during the movement. The slightly narrower grip options on most EZ bars can create greater triceps isolation for many lifters.
The straight barbell does retain certain advantages in specific contexts: It allows for precise grip width adjustments across a wider range. Some lifters find it creates stronger mind-muscle connection with the triceps based on individual biomechanics. It may enable slightly heavier loading for certain individuals due to mechanical efficiency.
Rather than declaring one option universally superior, consider these practical recommendations: If you're new to the exercise, start with an EZ bar due to its generally more comfortable positioning. If you have a history of elbow or wrist issues, the EZ bar is typically the safer choice. Experiment with both options to determine which feels most effective and comfortable for your individual structure. Consider using the EZ bar for higher-repetition work and possibly the straight bar for lower-repetition strength work if it feels comfortable.
Regardless of which implement you choose, prioritize proper form, appropriate loading, and pain-free execution over maximizing weight.
The appropriate weight for Skull Crushers depends on your experience level, current strength, and most importantly, your ability to maintain proper form throughout the movement. Unlike compound exercises where progressive overload through weight increases is heavily emphasized, isolation exercises like Skull Crushers require a more measured approach that prioritizes technique and joint health.
As a general guideline, select a weight that allows you to complete your target repetitions with strict form while feeling significant triceps engagement. For beginners, this typically means 8-12 repetitions with the last few being challenging but not causing form breakdown. For most male lifters with some training experience, this often translates to starting with 30-50 pounds (or an empty EZ bar plus small plates), while many female lifters might begin with 15-30 pounds. These numbers vary widely based on individual factors and should never be considered universal standards.
The key indicators that your weight selection is appropriate include: You can maintain stationary upper arms throughout the entire movement. You can control the weight during the entire lowering phase without acceleration. You feel primary fatigue in your triceps, not excessive joint stress. You can complete all intended repetitions without compromising form. You're able to lower the weight to approximately a 90-degree elbow angle with control.
Remember that Skull Crushers place significant mechanical stress on the elbow joint due to the extended lever arm. Progressing too quickly with weight increases is a common cause of elbow discomfort. Consider increasing repetitions or sets before adding weight, and when you do increase loading, use small increments (2.5-5 pounds) rather than larger jumps.
The optimal positioning for lowering the weight during Skull Crushers balances maximum triceps activation with joint comfort and safety. While the exercise's name suggests bringing the weight to your forehead, several factors should guide your precise bar path.
For most lifters, lowering the weight to the forehead or slightly above it provides the ideal combination of triceps stimulation and joint safety. This position typically creates approximately a 90-degree angle at the elbow joint at the bottom of the movement, which generates significant triceps tension while minimizing excessive elbow stress.
Several individual factors might influence your optimal bar position: Your arm length and proportions might require slight adjustments to find the most comfortable position. Elbow and shoulder mobility limitations may necessitate a slightly higher end position (less range of motion). Previous injuries or joint sensitivities might indicate a need for a more conservative range.
What should generally be avoided is lowering the weight significantly behind the head, which places the shoulders in a vulnerable position and can create excessive stress on both the shoulder and elbow joints. Similarly, stopping the movement with the elbows still substantially greater than 90 degrees (not lowering far enough) reduces the exercise's effectiveness.
The key is finding a position where you feel maximum triceps engagement with minimal joint stress. This might require some experimentation, but most lifters find that aiming for the forehead or slightly higher provides the optimal balance. Focus on the quality of triceps contraction rather than achieving an arbitrary range of motion benchmark that might not be appropriate for your individual structure.
Video Demonstrations

Log in to watch video demonstrations
Login to Watch2 video demonstrations available
Tips from the Community
-
Make sure you fully extend your elbow at the very end.
-
When you cant do anymore you can bring the barbell to your chest and press it up, allowing you to do negatives and work past failure
Track your progress with Gravitus
Download Gravitus to log your workouts, track your progress, and join a community of fitness enthusiasts.
Helpful Resources
One Rep Max Calculator
Find your one rep max for any exercise without maximal testing. Essential for developing effective strength training programs.
Calculate 1RMWorkout Programs
Follow structured workout programs created by fitness professionals to maximize your strength and muscle gains.
View Programs