Seated Row: The Ultimate Guide
The seated row is a fundamental back exercise that targets the middle back, lats, and biceps. This guide covers proper technique, variations, and programming strategies to strengthen your back and improve posture.

Quick Facts
Key Benefit
Develops back thickness and strength while improving posture and shoulder health
Primary Muscles
Lats, Rhomboids, Traps
Secondary Muscles
Biceps, Brachialis, Erector Spinae, Posterior Deltoids
Equipment
Cable Machine
Difficulty
Beginner
Type
Compound, Strength, Hypertrophy
In This Guide
Ready to master the Seated Row?
Track your progress, see improvements over time, and build strength consistently.
Download GravitusThe Seated Row is one of the most effective exercises for developing back thickness, strength, and improved posture. This compound pulling movement primarily targets the middle back muscles, latissimus dorsi, and biceps, making it an essential component of any well-rounded resistance training program. Unlike vertical pulling exercises like pull-ups and lat pulldowns that emphasize width, the seated row focuses on developing the thickness and density of the back musculature, particularly through the middle back region. This horizontal pulling pattern also helps counteract the forward-hunched position many people adopt from daily activities like computer work, driving, and phone use. Whether you're training for aesthetics, performance, or overall health, the seated row deserves a place in your routine. This comprehensive guide covers proper technique, common mistakes to avoid, effective variations, and programming strategies to help you maximize your results with this essential exercise.
Why the Seated Row Is Worth Mastering
The seated row offers several unique benefits that make it an essential exercise for back development and overall upper body balance:
Builds Back Thickness
Develops the often-neglected muscles of the middle back that create density and thickness, complementing vertical pulls that build width.
Improves Posture
Strengthens the exact muscles needed to counteract the forward-rounded shoulder position common in our tech-focused daily lives.
Balanced Shoulder Development
Strengthens the posterior (rear) shoulder chain to balance the typically overdeveloped anterior (front) muscles from pressing movements.
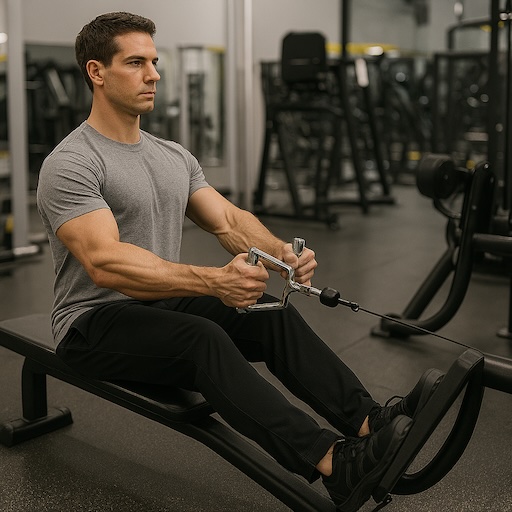
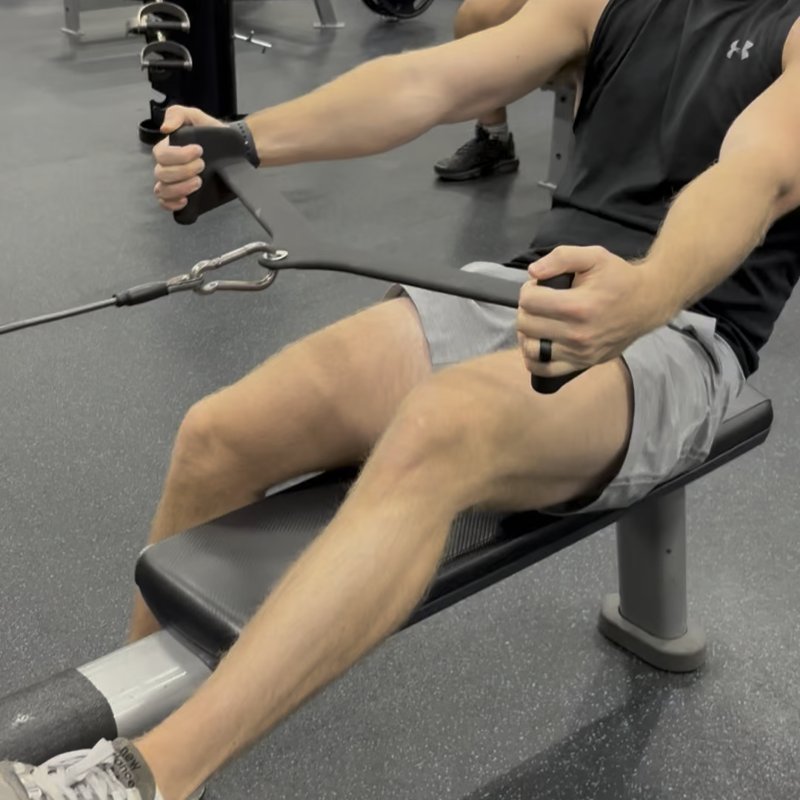
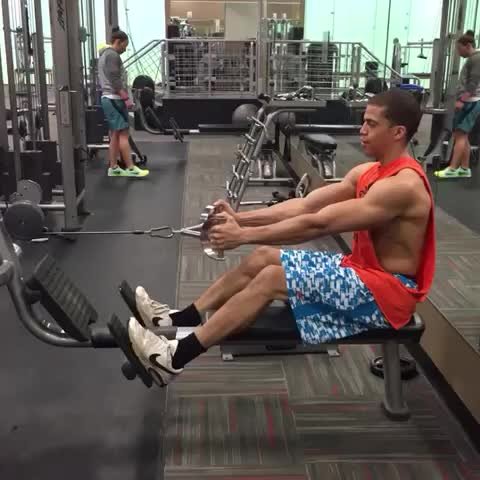
Proper Seated Row Form: Step-by-Step
Setup
- Adjust the seat height so the cable pulley aligns with your mid-chest level.
- Select an appropriate weight and attach your desired handle (V-handle, straight bar, or rope).
- Sit on the bench with feet firmly placed on the footplates or floor, knees slightly bent.
- Maintain a neutral spine position (natural curve in lower back) throughout the exercise.
- Reach forward to grasp the handle with both hands, arms fully extended but not locked.
The Movement
- Keeping your torso upright (or with a slight backward lean of about 10 degrees), pull your shoulder blades back and down to initiate the movement.
- Continue pulling the handle toward your midsection, driving your elbows back and keeping them close to your sides.
- At the end position, your elbows should be slightly behind your torso, shoulder blades fully retracted, and the handle touching or nearly touching your abdomen.
- Hold the contracted position briefly, focusing on squeezing your back muscles.
- Slowly return to the starting position, fully extending your arms while maintaining tension and control.
Key Form Tips
Initiate With Shoulder Blades
Start the movement by pulling your shoulder blades together, not by pulling with your arms.
Torso Position
Maintain an upright torso or slight backward lean (no more than 10-15 degrees) throughout the movement.
Elbow Path
Keep elbows close to your sides, not flaring outward, for better lat engagement.
Full Range of Motion
Allow for complete arm extension at the start and full contraction at the finish.
Controlled Movement
Use a 21 tempo ratio (slower on the eccentric/lowering phase) for optimal muscle development.
Chest Position
Maintain a "proud chest" position throughout the movement, avoiding rounded shoulders.
Muscles Worked in the Seated Row
Primary Muscles
- lats: The large, flat muscles that span the width of the mid and lower back, responsible for pulling the arms toward the body.
- rhomboids: The diamond-shaped muscles between the shoulder blades that retract the scapulae and are heavily engaged during the row.
- traps: The middle and lower portions of the traps assist in scapular retraction and depression during the rowing movement.
Secondary Muscles
- posterior deltoids: The posterior portion of the shoulder muscles work to pull the arms backward during the rowing motion.
- biceps: The front arm muscles assist in the pulling movement by flexing the elbow.
- brachialis: These arm muscles assist the biceps in elbow flexion during the row.
- erector spinae: The muscles running along the spine work isometrically to maintain proper posture throughout the exercise.
Common Mistakes and How to Avoid Them
Using excessive body momentum
Rocking back and forth to move the weight reduces muscle engagement and increases injury risk. Keep your torso relatively stationary with only a slight lean back (10-15 degrees maximum) and focus on moving the weight through controlled muscle contraction.
Pulling with the arms instead of the back
Initiating the movement with the biceps rather than the back muscles diminishes back development. Start each rep by retracting your shoulder blades before bending your elbows, thinking of your hands as hooks and your arms as chains.
Rounded shoulders and poor posture
Allowing the shoulders to round forward reduces back activation and reinforces poor posture patterns. Maintain chest up and shoulders back throughout the movement, focusing on squeezing the shoulder blades together at the peak contraction.
Incomplete range of motion
Not fully extending the arms or not pulling back far enough limits muscle development. Allow for a complete stretch at the start position (arms extended but not locked) and full contraction at the finish (elbows slightly behind torso).
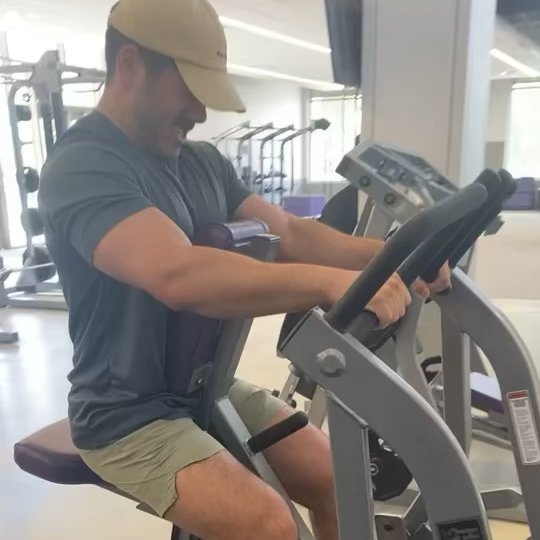
Seated Row Variations
Grip Variations
-
Wide-Grip Seated Row
Using a wide grip with a straight bar attachment places more emphasis on the upper back and rear deltoids.
-
Close-Grip Seated Row
A narrow grip with a V-handle or rope attachment shifts more focus to the lower lats and provides a longer range of motion.
-
Neutral-Grip Seated Row
Using a parallel grip (palms facing each other) provides a more natural hand position that can be easier on the wrists and elbows.
Advanced Variations
-
Single-Arm Seated Row
Performing the movement one arm at a time increases core activation and helps address strength imbalances between sides.
-
Incline Bench Supported Row
Using an incline bench for torso support eliminates the need for core stabilization, allowing complete focus on back muscles.
-
Meadows Row
A specialized landmine-based row that creates a unique angle to target the lats and upper back from a different position.
FAQs About the Seated Row
The seated row offers unique benefits compared to other rowing variations. Unlike barbell rows or dumbbell rows where you bend forward, the seated position provides back support, making it easier to maintain proper form and reducing lower back stress. Compared to machine rows, the cable provides consistent tension throughout the movement and allows for greater variety in attachments and grip positions. Each rowing variation has its place in a complete program, with the seated cable row being particularly valuable for building mind-muscle connection with the back.
Some backward lean is acceptable and can be beneficial, but it should be minimal (10-15 degrees at most). Excessive leaning turns the exercise into more of a modified pulldown than a row. The slight lean can help engage the lats more effectively while maintaining proper form. What's most important is consistency in your torso position throughout the set—don't start upright and gradually lean back more with each repetition as fatigue sets in.
The best attachment depends on your goals and comfort. A V-handle or close-grip attachment typically allows for a longer range of motion and greater lat engagement. A wide bar shifts more emphasis to the upper back and rear deltoids. A rope attachment enables a powerful squeeze at the end of the movement with slight wrist rotation. For balanced development, rotate between different attachments periodically, or select based on which back areas you're prioritizing in your current training phase.
Video Demonstrations

Log in to watch video demonstrations
Login to Watch3 video demonstrations available
Find more video demonstrations in the Gravitus app
Tips from the Community
-
At the end of the movement, drive your elbows back as far as possible and bring your shoulder blades together.
-
Sit back far enough to get a good lat stretch in the extended position.
-
Don’t pivot using your back to move the weight. Brace your core, use your back muscles to pull the weight via your arms and squeeze for a second at the top of the movement before returning to the beginning.
-
Brace your core. Sit upright and avoid leaning backwards to move the weight.
-
Keep your lower back as flat as posible
Track your progress with Gravitus
Download Gravitus to log your workouts, track your progress, and join a community of fitness enthusiasts.
Helpful Resources
One Rep Max Calculator
Find your one rep max for any exercise without maximal testing. Essential for developing effective strength training programs.
Calculate 1RMWorkout Programs
Follow structured workout programs created by fitness professionals to maximize your strength and muscle gains.
View Programs