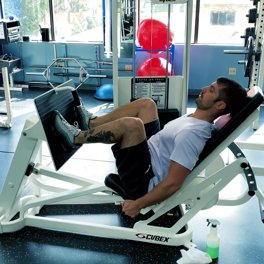
Seated Leg Press: The Ultimate Guide
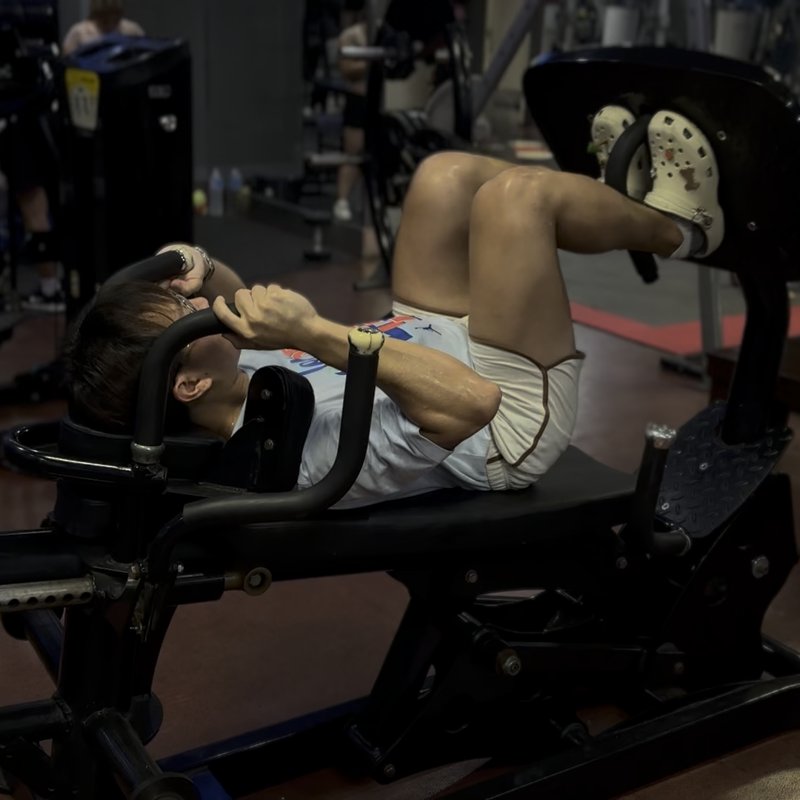
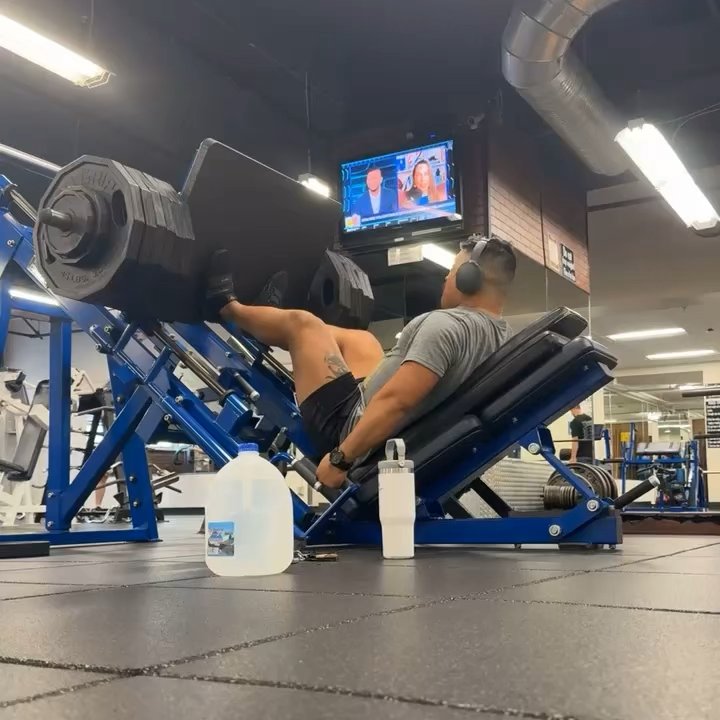
The Seated Leg Press is a compound lower body exercise performed on a machine that primarily targets the quadriceps, hamstrings, and glutes while allowing for heavy loading with minimal stress on the spine.

Quick Facts
Key Benefit
Quad development and overall leg strength with minimal spinal loading
Primary Muscles
Glutes, Hamstrings, Quadriceps
Secondary Muscles
Abdominals, Calves, Erector Spinae, Hip Adductors
Equipment
machine
Difficulty
Beginner
Type
Compound
In This Guide
Ready to master the Seated Leg Press?
Track your progress, see improvements over time, and build strength consistently.
Download GravitusThe Seated Leg Press is one of the most effective machine-based exercises for developing lower body strength and muscle mass. This movement primarily targets the quadriceps, hamstrings, and gluteal muscles while also engaging the calves and adductors as secondary movers. Unlike free-weight squat variations that require significant core strength and technical proficiency, the seated leg press provides external support and a fixed movement path, making it an excellent option for beginners learning basic leg drive mechanics or experienced lifters looking to isolate the lower body musculature without taxing the lower back. The machine's design allows for safe handling of heavy loads, providing an effective stimulus for muscle growth and strength development while minimizing risk. Additionally, most leg press machines offer adjustable seat positions and foot placement options, allowing you to shift emphasis between different muscle groups based on your specific goals. Whether you're looking to build impressive quadriceps development, strengthen your posterior chain, rehabilitate from certain injuries, or simply add variety to your lower body training, the seated leg press delivers reliable results in a controlled, joint-friendly environment.
Benefits of Seated Leg Press
The seated leg press offers several unique advantages as a lower body exercise.
Reduced Lower Back Stress
The supported seated position removes much of the compressive and shear forces on the spine that occur during free-weight squat variations.
Heavy Loading Potential
The machine's design allows for handling substantial weights safely, making it excellent for progressive overload and strength development.
Muscle Isolation
With back support and stability handled by the machine, you can focus entirely on working the leg muscles without concern for balance or torso position.
Customizable Targeting
Various foot positions allow for shifting emphasis between different muscle groups—higher for hamstrings/glutes, lower for quadriceps, wider for adductors, etc.
Accessibility
The guided movement pattern and external support make it suitable for beginners, older adults, or those with certain mobility limitations.
Recovery-Friendly
Can be used effectively during recovery phases or deload weeks when spinal loading needs to be minimized while maintaining leg training stimulus.
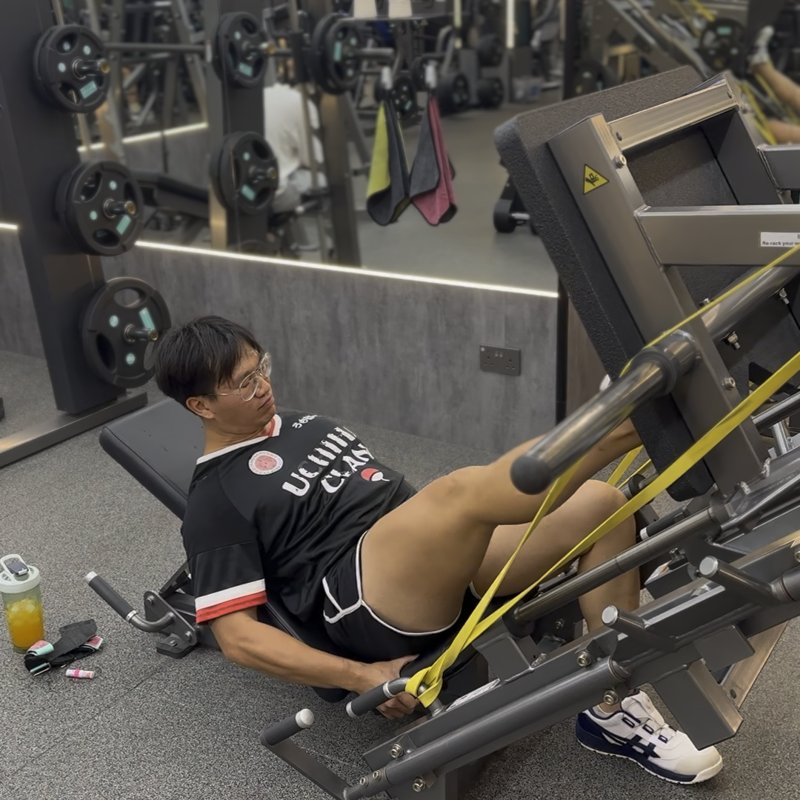
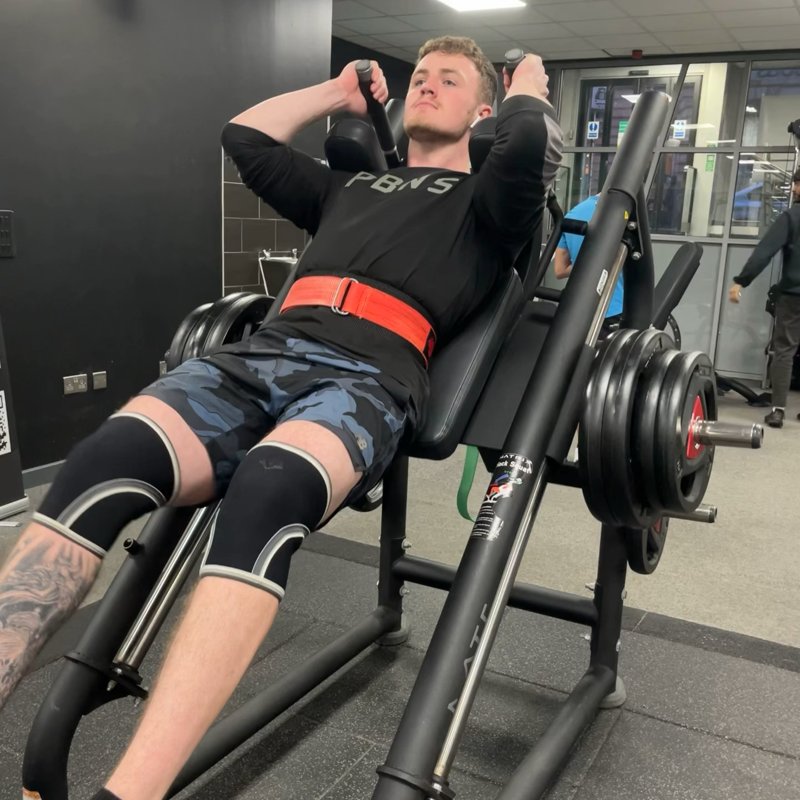
Proper Form & Technique
Setup
- Adjust the seat position so that when seated with your back against the pad, your knees form approximately a 90-degree angle in the starting position.
- Ensure the seat back is locked securely in place and provides firm support for your entire back.
- Sit in the machine and place your feet on the platform at approximately shoulder-width apart.
- Position your feet with toes pointing slightly outward (about 5-15 degrees) for most people.
- Ensure your feet are positioned firmly on the platform, typically at mid-foot level (not too high or too low).
- Grasp the handles or side supports of the machine for stability.
- Keep your head in a neutral position, looking straight ahead or slightly upward.
- Take a deep breath, engage your core, and prepare for the movement.
Movement
- Release the safety stops or mechanism that holds the weight in place.
- Begin with controlled descent, allowing your knees to bend as the platform moves toward you.
- Lower the weight until your knees reach approximately a 90-degree angle (or slightly deeper if comfortable for your knees).
- Maintain firm contact between your back and the seat pad throughout the movement.
- Keep your feet flat on the platform—avoid rising onto your toes or heels lifting.
- Once you reach the desired depth, push through your entire foot to drive the platform away from you.
- Extend your legs with control, avoiding explosive lockout that could hyperextend the knees.
- Stop just short of full lockout to maintain tension on the working muscles.
- Exhale during the pushing phase as you extend your legs.
- Repeat for the desired number of repetitions, maintaining control throughout.
- After completing your set, secure the safety mechanisms before exiting the machine.
Key Form Tips
Knee Tracking
Ensure your knees track in line with your toes throughout the movement, avoiding inward collapse.
Back Position
Keep your lower and mid-back pressed firmly against the seat pad throughout the entire movement.
Breathing
Inhale during the descent phase and exhale during the pushing phase to enhance core stability and power output.
Range of Motion
Lower to a depth that feels comfortable for your knees and hips without forcing excessive range that compromises form.
Foot Pressure
Push through your entire foot (heel, mid-foot, and ball), avoiding shifting weight primarily to your toes during the ascent.
Muscles Worked
Primary Muscles
- Quadriceps: The four muscles at the front of the thigh (rectus femoris, vastus lateralis, vastus medialis, vastus intermedius) that extend the knee during the pushing phase.
- glutes: The largest muscle in the buttocks, which contributes significantly to hip extension, particularly when using a higher foot position.
- Hamstrings: The muscles at the back of the thigh that assist in hip extension during the movement, with greater engagement when using a higher foot position.
Secondary Muscles
- hip adductors: The inner thigh muscles that assist in stabilizing the legs, particularly when using a wider stance.
- Calves: The gastrocnemius and soleus work to stabilize the ankle joint throughout the movement and assist at the final stages of extension.
- abdominals: While not primary movers, the abdominals and lower back muscles work isometrically to maintain proper position and stability.
- Erector Spinae: The lower back muscles work isometrically to maintain proper back position against the pad, though much less so than in free-weight squats.
Common Mistakes and How to Fix Them
Lifting Lower Back Off the Pad
Allowing your lower back to lift off the seat pad during the movement increases lumbar stress and reduces leg focus. Keep your entire back—especially the lower back—firmly pressed against the seat pad throughout the entire exercise. If you find your back coming off the pad, it likely indicates you're using too much weight or going too deep for your current mobility. Reduce the load and focus on maintaining back contact before progressively increasing weight again. Some machines allow for adjusting the back angle slightly—experiment to find a position that lets you maintain proper contact. Consider using a slightly higher foot position if back position remains challenging, as this reduces the required range of motion at the lower back.
Locking Out Knees Completely
Fully locking out (hyperextending) the knees at the top of the movement can place excessive stress on the joint. Stop just short of complete lockout, maintaining slight tension in the quadriceps at the top position. Think about pushing to 95% extension rather than 100%, avoiding the "snap" into lockout. This technique keeps tension on the muscles throughout the set and reduces unnecessary joint stress. If you habitually lock out, implement a deliberate tempo with a 1-second pause just before full extension to reinforce the proper end position. Remember that the goal is muscle development and strength, not testing the limits of joint extension.
Using Too Narrow Range of Motion
Not lowering to sufficient depth limits muscle development and range of motion benefits. While respecting individual mobility differences, aim to lower until your knees reach at least a 90-degree angle for most trainees. If mobility allows and it's comfortable for your knees, you may go slightly deeper. Use a controlled tempo during the descent to ensure you're not cutting the range short due to momentum. If limited range is due to mobility restrictions, consider incorporating specific mobility work for the ankles, hips, and knees into your warm-up routine. Remember that appropriate depth varies between individuals—focus on what allows full muscle engagement while remaining comfortable for your joints.
Rising onto Toes During Push
Shifting weight to the balls of your feet or toes during the pushing phase reduces force production and alters muscle recruitment. Maintain pressure through your entire foot—heel, mid-foot, and forefoot—throughout the movement. If you notice weight shifting forward, it may indicate poor ankle mobility or improper foot placement. Try positioning your feet slightly higher on the platform or using a technique cue like "push through the heels" to counter this tendency. Some lifters find that pointing their toes slightly outward (5-15 degrees) helps maintain more even foot pressure throughout the range of motion.
Allowing Knees to Cave Inward
Letting the knees collapse inward (valgus) during the movement increases injury risk and reduces effectiveness. Focus on actively pressing your knees outward in line with your toes throughout the exercise, particularly during the pushing phase. Cue yourself to "spread the floor" with your feet, which helps engage the hip abductors and maintain proper knee tracking. Consider using a slightly wider stance if knee positioning is consistently problematic. For those with significant knee valgus tendencies, specific strengthening exercises for the glute medius and other hip abductors may be beneficial between leg press sessions.
Inconsistent Foot Placement
Randomly changing foot position between workouts or even sets makes progress tracking difficult and reduces mastery of the movement. While different foot positions serve specific purposes, be intentional about position selection and consistent with your approach. Document your foot position (height and width) for different training phases or goals. Many leg press machines have numbered markings on the platform—use these to ensure consistency. If targeting overall leg development, establish a default "neutral" position (roughly shoulder-width, mid-platform) as your standard before experimenting with specialized positions for specific goals.
Exercise Variations
Foot Position Variations
-
High Foot Placement Leg Press
Positioning feet near the top of the platform to increase hamstring and glute engagement while reducing knee flexion demands.
-
Low Foot Placement Leg Press
Placing feet near the bottom of the platform to maximize quadriceps involvement and increase knee flexion.
-
Wide Stance Leg Press
Using a stance wider than shoulder width to increase adductor and inner quad involvement.
-
Narrow Stance Leg Press
Positioning feet closer together than shoulder width to place greater emphasis on the outer sweep of the quadriceps.
Technical Variations
-
Single-Leg Press
Performing the movement with one leg at a time to address muscle imbalances and increase the stability challenge.
-
Tempo Leg Press
Manipulating the speed of different phases of the movement, such as a slow 4-second eccentric (lowering) phase followed by a more explosive concentric phase.
-
Pause Leg Press
Adding a deliberate 2-3 second pause at the bottom position to eliminate momentum and increase time under tension.
-
Partial Range Leg Press
Performing the movement through a limited range (top half, bottom half, or middle range) to focus on specific sticking points or work around mobility limitations.
Programming Variations
-
Drop Set Leg Press
Performing a set to near failure, then immediately reducing the weight and continuing for additional repetitions without rest.
-
Rest-Pause Leg Press
Completing a challenging set, taking a very brief rest (10-15 seconds), then performing additional repetitions with the same weight.
-
Descending Sets
Starting with higher repetitions and lighter weight, then adding weight and reducing repetitions across multiple consecutive sets without full recovery.
-
1½ Repetition Leg Press
Performing a full repetition followed by a half repetition (halfway up and back down) before returning to the starting position, increasing time under tension.
Frequently Asked Questions
Neither exercise is inherently "better" than the other—they each offer distinct benefits that make them complementary rather than competitive. The leg press excels at safely handling heavy loads with minimal technical skill required, allows targeted emphasis on different leg muscles through foot positioning, and reduces lower back stress compared to free-weight squats. This makes it particularly valuable for beginners, those with certain back issues, or when the goal is isolated leg development without systemic fatigue. Squats, however, engage more total musculature, requiring significant core, lower back, and upper body involvement for stabilization. They typically create greater hormonal response, have more functional carryover to real-world movements, and develop balance and coordination alongside strength. For most trainees, incorporating both exercises in a well-designed program offers the most comprehensive development. You might use squats as your primary movement when focusing on overall strength and athletic performance, while using the leg press for additional volume, targeted muscle development, or during phases when reducing spinal loading is beneficial. The "best" approach depends on your specific goals, injury history, equipment availability, and individual biomechanics rather than an either/or proposition.
Foot placement on the leg press platform significantly impacts which muscle groups receive the greatest emphasis, so the "ideal" position depends on your specific goals. For balanced overall leg development, position your feet at approximately shoulder width apart in the middle of the platform, with toes pointed slightly outward (5-15 degrees). This neutral position engages the quadriceps, hamstrings, and glutes relatively evenly. To emphasize the quadriceps more, place your feet lower on the platform and closer together. This increases knee flexion and reduces hip flexion, shifting more work to the front thigh muscles. For greater hamstring and glute emphasis, position your feet higher on the platform. This decreases knee flexion while increasing hip flexion, directing more tension to the posterior chain. To target the adductors (inner thighs) more, use a wider stance with toes pointed slightly outward. Individual factors like limb length, hip structure, and mobility will influence your optimal foot position, so some experimentation is beneficial. Whatever position you choose, ensure your knees track in line with your toes throughout the movement to reduce joint stress. For comprehensive development, consider rotating between different foot positions across training cycles, or even within the same workout for more advanced trainees.
The appropriate depth for leg press repetitions varies between individuals based on mobility, comfort, and specific goals, but some general guidelines apply. For most trainees seeking balanced muscle development, lowering until your knees form approximately a 90-degree angle provides an effective range of motion that engages the leg musculature through a substantial functional range. Some lifters with good mobility may benefit from going slightly deeper (perhaps to 100-110 degrees of knee flexion) to increase range of motion and stretch stimulus, but this should never come at the expense of proper form. Signs that you've gone too deep include: lower back lifting off the pad (posterior pelvic tilt), knees caving inward, heels lifting from the platform, or discomfort in the knee joints. Depth should be consistent between repetitions to ensure proper loading patterns and progress tracking. If you're training around specific injuries or mobility limitations, work within a pain-free range, potentially using a slightly higher foot position to reduce knee flexion demands. Remember that proper control throughout the selected range is more important than achieving an arbitrary depth—quality of movement should always take precedence over quantity of range.
Most people respond well to training each major muscle group 2-3 times per week with sufficient recovery between sessions. For the leg press specifically, incorporating it 1-2 times weekly is typically optimal for most trainees. If following a body part split, you might perform this exercise on your designated leg day once per week. With an upper/lower split, it could be included in one of your two weekly lower body sessions. For full-body training, it might appear in 1-2 of your 3-4 weekly workouts. Consider your overall lower body training volume—the leg press is just one component of complete leg development that should be balanced with hip hinge patterns, knee-dominant movements, and potentially direct glute or calf work. More advanced lifters might benefit from undulating approaches where the exercise appears twice weekly but with different loading parameters or foot positions each session (e.g., heavier/lower reps with a neutral foot position in one session, moderate weight/higher reps with varied foot placements in another). Monitor recovery between sessions—if leg performance decreases or joint discomfort develops, you may need more recovery time or reduced volume. The optimal frequency also depends on your training split, other exercises in your program, and individual recovery capacity.
For most training purposes, completely locking out (fully extending) the knees at the top of the leg press is unnecessary and potentially counterproductive. Instead, stop just short of full lockout, maintaining slight tension in the quadriceps at the top position. This approach offers several benefits: First, it keeps constant tension on the working muscles throughout the set, which can enhance muscle development. Second, it reduces unnecessary stress on the knee joint that occurs with hyperextension. Third, it prevents the momentary rest that happens at lockout, increasing overall time under tension. That said, brief lockout may be appropriate in certain circumstances, such as during very heavy strength-focused sets where a momentary respite might be needed between repetitions, or for beginners learning to feel the difference between full extension and hyperextension. If you do reach full extension, do so with control rather than snapping into lockout, and avoid pushing beyond the natural end range of knee extension. Remember that the primary goal of the leg press for most people is muscle development and strength, not testing the limits of joint extension. If you're unsure about your technique, consider having a qualified fitness professional observe your form and provide personalized guidance.
Video Demonstrations

Log in to watch video demonstrations
Login to Watch2 video demonstrations available
Track your progress with Gravitus
Download Gravitus to log your workouts, track your progress, and join a community of fitness enthusiasts.
Helpful Resources
One Rep Max Calculator
Find your one rep max for any exercise without maximal testing. Essential for developing effective strength training programs.
Calculate 1RMWorkout Programs
Follow structured workout programs created by fitness professionals to maximize your strength and muscle gains.
View Programs