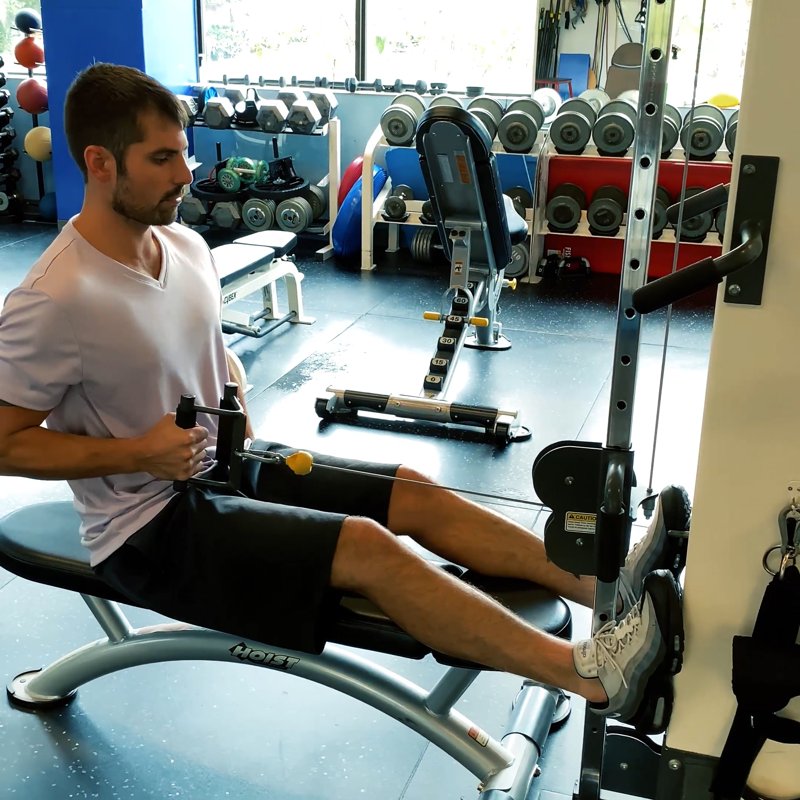
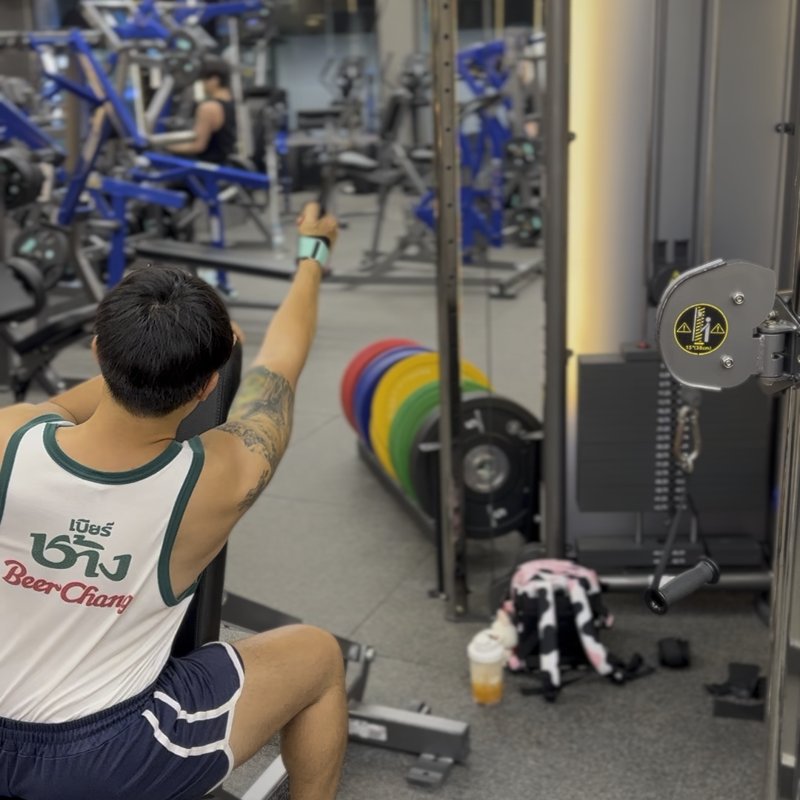
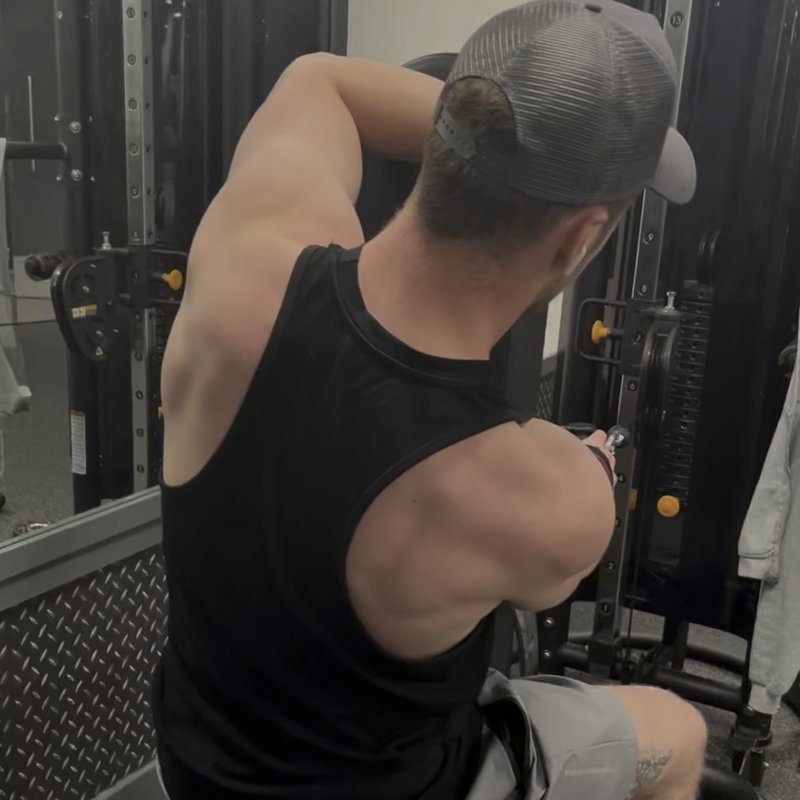
One-Arm Seated Cable Row: The Ultimate Guide
The One-Arm Seated Cable Row is a unilateral back exercise that targets the latissimus dorsi, rhomboids, and rear deltoids by pulling a cable attachment toward your torso one arm at a time, allowing for focused development and correction of muscle imbalances.

Quick Facts
Key Benefit
Balanced back development with enhanced mind-muscle connection
Primary Muscles
Lats, Posterior Deltoids, Rhomboids, Traps
Secondary Muscles
Biceps, Brachialis, Erector Spinae, Obliques
Equipment
cable machine
Difficulty
Intermediate
Type
Strength
In This Guide
Ready to master the One-Arm Seated Cable Row?
Track your progress, see improvements over time, and build strength consistently.
Download GravitusThe One-Arm Seated Cable Row stands as one of the most effective unilateral back exercises, offering unique benefits that bilateral rowing variations cannot provide. This focused movement allows you to target each side of your back independently, creating an excellent opportunity to address muscle imbalances, enhance mind-muscle connection, and develop greater coordination in your pulling pattern.
Unlike traditional two-armed rows where your stronger side might compensate for your weaker side, the one-arm approach ensures each side receives appropriate stimulus for balanced development. The exercise primarily targets the latissimus dorsi (lats), rhomboids, and rear deltoids, but also engages the biceps, forearm flexors, and core stabilizers, making it a comprehensive upper body pull.
What makes the One-Arm Seated Cable Row particularly valuable is how the unilateral nature forces your core to work harder to prevent rotation, creating an anti-rotational component that builds functional strength and stability. Additionally, the cable provides constant tension throughout the entire range of motion, unlike free weight alternatives where resistance varies based on lever arm and gravity.
Whether your goal is addressing muscular asymmetries, enhancing back definition, improving posture, or simply adding variety to your training program, the One-Arm Seated Cable Row delivers results with excellent control and customization options.
Benefits of the One-Arm Seated Cable Row
The unilateral nature of this exercise provides several distinct advantages over traditional bilateral rowing movements.
Muscle Imbalance Correction
Working one arm at a time reveals and addresses strength discrepancies between the left and right sides of your back, leading to more balanced development.
Enhanced Mind-Muscle Connection
The unilateral focus allows for greater mental concentration on the working muscles, improving neuromuscular coordination and conscious control of the back muscles.
Core Activation
Resisting the rotational force created by pulling with one arm significantly engages the core musculature, particularly the obliques, providing an anti-rotational training effect.
Range of Motion Optimization
Working one arm at a time allows for a slightly increased range of motion and better scapular retraction compared to bilateral variations where the chest may limit full contraction.
Joint-Friendly Alternative
The unilateral approach typically allows for more natural shoulder positioning and can be more comfortable for those with certain shoulder issues compared to bilateral rows.
Functional Strength Development
The exercise closely mimics real-world unilateral pulling patterns used in daily activities and sports, enhancing functional fitness and performance.
Proper Form & Technique
Setup
- Attach a single handle to a seated cable row machine at chest height.
- Sit facing the cable machine with feet firmly planted on the footplates or floor.
- Maintain a tall, upright posture with chest up and shoulders back.
- Extend your arm to grasp the handle, keeping a slight bend in the elbow.
- Position your torso at approximately 90 degrees to the floor (upright) or with a slight forward lean (10-15 degrees) if more comfortable.
- Place your non-working hand on your thigh or lightly hold the side of the bench for stability.
Movement
- Initiate the movement by retracting your shoulder blade, pulling it back and slightly down.
- Pull the handle toward your torso by driving your elbow back, keeping it close to your body.
- Focus on using your back muscles rather than your arm to move the weight.
- Continue pulling until the handle reaches the side of your torso, approximately at the level of your lower ribs.
- At the end position, your shoulder blade should be fully retracted and your elbow positioned behind your torso.
- Squeeze your back muscles intensely at the point of maximum contraction for 1-2 seconds.
Return
- Slowly extend your arm forward, controlling the weight rather than allowing it to pull you forward.
- Maintain proper torso position—resist the tendency to lean forward as the weight moves away from you.
- Allow your shoulder blade to protract (move forward) in a controlled manner.
- Continue until your arm is almost fully extended with a slight bend in the elbow to maintain tension.
- Immediately begin the next repetition without pausing at the extended position.
- After completing all repetitions on one side, switch to the other arm.
Key Form Tips
Initiation Pattern
Begin the movement by retracting your shoulder blade rather than bending your elbow—think "shoulder before elbow" for optimal back engagement.
Elbow Path
Keep your elbow close to your body throughout the movement to maximize lat activation and minimize shoulder stress.
Core Engagement
Brace your abdominals and obliques to resist the rotational force, keeping your torso stable and facing forward.
Wrist Position
Maintain a neutral wrist position (neither flexed nor extended) throughout the movement to optimize force transfer and reduce strain.
Range of Motion
Focus on achieving full shoulder blade retraction at the end of the pull and controlled protraction at the end of the extension.
Breathing Pattern
Exhale during the pulling phase and inhale during the return phase to enhance stability and power output.
Muscles Worked
Primary Muscles
- lats: The largest back muscle, extending from the mid-back to the waist, is the primary mover during the rowing motion, responsible for pulling the arm back and downward.
- Rhomboids: These muscles between the spine and shoulder blades contract powerfully to retract the scapula, particularly during the latter portion of the pulling phase.
- traps: The middle and lower portions of this large triangular muscle assist in scapular retraction and depression during the rowing movement.
- posterior deltoids: The rear part of the shoulder muscle works to extend the arm backward during the rowing motion, receiving significant activation during the movement.
Secondary Muscles
- biceps: The front arm muscle assists in elbow flexion during the pulling phase, acting as a secondary mover to the larger back muscles.
- brachialis: These elbow flexors provide assistance during the pulling phase, particularly when using a neutral grip handle.
- Erector Spinae: The lower back muscles work isometrically to maintain proper torso positioning throughout the exercise.
- Obliques: The side abdominal muscles activate strongly to resist rotation as you pull with one arm, providing an anti-rotational training effect.
- Rectus Abdominis: The "six-pack" muscles engage isometrically to stabilize the torso and maintain proper positioning throughout the movement.
Common Mistakes and How to Fix Them
Using Excessive Body Movement
Rotating or rocking the torso to generate momentum reduces back activation and increases injury risk. Fix by using a lighter weight that allows for strict form and focusing on keeping your chest forward throughout the movement. Engage your core muscles to resist rotation, and if necessary, place your non-working hand on a stable surface for added support. Consider performing the exercise in front of a mirror to monitor torso position.
Pulling with the Arm Instead of the Back
Initiating the movement with elbow flexion rather than scapular retraction reduces back muscle recruitment. Focus on starting the movement by pulling your shoulder blade back and down before bending your elbow. Think of your arm as a hook connecting you to the weight rather than the primary mover. A helpful cue is to imagine squeezing an object between your shoulder blades at the start of each pull.
Insufficient Range of Motion
Not achieving full shoulder blade retraction at the end of the pull or not allowing adequate extension at the start limits muscle development. Focus on pulling until the handle reaches your torso with your shoulder blade fully retracted, and then extending until you feel a stretch in your lat at the beginning of each rep. If limited mobility prevents full range of motion, gradually work to improve it over time while working within your current capabilities.
Poor Posture During the Movement
Rounding the upper back or allowing the shoulders to roll forward reduces effectiveness and increases injury risk. Maintain a proud chest position with shoulders pulled back and down throughout the exercise. Set up with proper posture before beginning, and reset between sets if necessary. Strengthening the upper back and stretching the chest muscles separately can help improve postural awareness and capability over time.
Excessive Weight
Using too much resistance leads to form breakdown and reduces the back's involvement. Select a weight that allows you to perform 8-12 controlled repetitions with proper form, where you can feel the target muscles working throughout the movement. It's better to use a lighter weight with perfect technique than a heavier weight with compromised form. Remember that unilateral exercises typically require approximately 60% of the weight used for bilateral variations.
Wrist Deviation
Allowing the wrist to bend excessively during the movement can cause discomfort and reduce force transfer to the target muscles. Maintain a neutral wrist position aligned with your forearm throughout the entire range of motion. Think of your hand as a simple hook that connects to the handle. If wrist discomfort persists, experiment with different handle attachments that may allow for more comfortable positioning.
Exercise Variations
Grip Variations
-
Neutral-Grip One-Arm Row
Using a handle that allows for a neutral grip (palm facing the body), which may be more comfortable for the shoulder joint and emphasizes slightly different aspects of the back musculature.
-
Pronated-Grip One-Arm Row
Utilizing an overhand grip (palm facing down) to increase emphasis on the rear deltoids and upper back muscles.
-
Supinated-Grip One-Arm Row
Employing an underhand grip (palm facing up) to increase biceps involvement while still effectively targeting the lats.
Position Variations
-
Standing One-Arm Cable Row
Performing the exercise in a standing position, which increases core and lower body stabilization requirements while maintaining the primary back training stimulus.
-
Incline Bench One-Arm Cable Row
Executing the movement while supported face-down on an inclined bench, which provides upper body stabilization while allowing for a different pulling angle.
-
Split-Stance One-Arm Cable Row
Adopting a staggered foot position (one foot forward, one back) to enhance stability and incorporate more lower body engagement.
-
Kneeling One-Arm Cable Row
Performing the exercise from a half-kneeling position, creating a more stable base while still challenging core stabilization.
Technical Variations
-
High-to-Low One-Arm Cable Row
Pulling from a high pulley position downward toward the hip, which targets the lats from a different angle and mimics a climbing or pulling-down motion.
-
Low-to-High One-Arm Cable Row
Starting with the cable set low and pulling upward toward the chest, which increases lower trap and rear deltoid emphasis.
-
One-Arm Cable Face Pull
Pulling the cable toward the face rather than the torso, which focuses more on the rear deltoids and external rotators while still engaging the upper back.
-
One-Arm Meadows Row
A specialized cable variation where you stand perpendicular to the cable machine and row with a more vertical arm path, named after bodybuilder John Meadows.
Frequently Asked Questions
The One-Arm Seated Cable Row differs from the standard bilateral version in several key ways. First, it creates an anti-rotational challenge that significantly increases core engagement, as your abdominals and obliques must work harder to prevent torso rotation during the unilateral pull. Second, it allows for identification and correction of strength imbalances between sides that might go unnoticed in bilateral work, where the stronger side can compensate for the weaker one. Third, the unilateral focus typically enhances mind-muscle connection, allowing for better conscious control and activation of the target muscles. Fourth, working one arm at a time often allows for a slightly greater range of motion, particularly at the end of the contraction, as the chest doesn't limit how far back you can pull the handle. From a practical standpoint, unilateral training also allows for more natural shoulder positioning, which can be beneficial for those with shoulder mobility issues or discomfort in certain positions. Overall, while bilateral cable rows are excellent for general back development and efficiency, the one-arm variation offers unique benefits for balance, core development, and targeted muscle activation.
Ideally, your goal should be to develop balanced strength between both sides of your body, which would eventually mean using the same weight for the same number of repetitions on each arm. However, if you identify a strength discrepancy between sides (which is common and normal), there are two effective approaches to address this. The first method is to match your weaker side—whatever weight and repetition scheme your weaker arm can handle with proper form becomes the standard for both arms. This prevents the stronger side from continuing to advance disproportionately. The second approach is to use appropriate weights for each side but give the weaker side priority by training it first when you're fresh and possibly adding an extra set to provide additional stimulus. Over time, with consistent training using either approach, the strength discrepancy should diminish. Minor differences (5-10%) between dominant and non-dominant sides are considered normal and not necessarily problematic, but addressing larger imbalances can improve overall function and potentially reduce injury risk.
For most trainees, incorporating One-Arm Seated Cable Rows 1-2 times per week provides sufficient stimulus for development while allowing adequate recovery. If you're following a body-part split routine, include it on your designated back day or pull day. For those using upper/lower splits, it fits naturally into upper body sessions. If you're training with a push/pull/legs approach, incorporate it during pull workouts. When training back twice weekly, consider using different variations of the exercise in each session—perhaps focusing on strength with heavier weights and lower repetitions in one workout, then emphasizing mind-muscle connection with moderate weights and controlled tempo in the other. For more advanced trainees following specialized programs, frequency can occasionally increase to 3 times weekly if overall volume and intensity are managed appropriately. Remember that the back muscles are also indirectly worked during many other exercises, so factor this into your overall training volume. As with any exercise, monitor your recovery—persistent soreness, decreased performance, or joint discomfort may indicate a need for more recovery time between sessions.
Experiencing more biceps activation than back engagement is a common issue with rowing movements and typically stems from several correctable technique factors. First, check your initiation pattern—if you're beginning the movement by bending your elbow rather than retracting your shoulder blade, you're primarily using arm strength instead of back muscles. Focus on starting each repetition by pulling your shoulder blade back and down before your elbow bends. Second, consider your grip—a tighter grip can sometimes lead to greater biceps dominance, so try using a slightly looser grip while still maintaining control. Third, evaluate the weight—if it's too heavy, your body will naturally recruit more biceps to assist. Try reducing the weight and focusing exclusively on feeling your back muscles work. Fourth, implement a brief pause at the contracted position, actively squeezing your shoulder blade toward your spine. Fifth, try using a mind-muscle visualization—imagine your hand as merely a hook and your arm as a rope, with your back muscles doing the actual pulling. Finally, consider trying a pronated (overhand) grip temporarily, which mechanically reduces biceps involvement and can help you reconnect with the sensation of proper back activation before returning to your preferred grip style.
While the One-Arm Seated Cable Row offers unique benefits through its constant tension and customizable angle of pull, several effective alternatives exist when cable equipment isn't available. The closest free-weight substitute is the One-Arm Dumbbell Row, typically performed with one knee and hand supported on a bench. This exercise targets similar muscles but has a different resistance profile—being most challenging in the middle of the movement rather than providing constant tension throughout. Another effective alternative is the Meadows Row, performed with a barbell or T-bar in a landmine setup, which offers a unique angle of pull that can be particularly effective for lat development. For those without access to any equipment, inverted rows performed on a sturdy table, desk, or Smith machine (using one arm at a time) can provide an effective bodyweight alternative. Resistance bands anchored to a sturdy object can also simulate the cable rowing pattern when traveling or training at home. Each variation offers slightly different benefits in terms of stability requirements, resistance curves, and practical convenience, making them valuable options to rotate through your program even when cable equipment is available.
Video Demonstrations

Log in to watch video demonstrations
Login to Watch3 video demonstrations available
Find more video demonstrations in the Gravitus app
Tips from the Community
-
Make sure you don’t push with your legs. (Video does a good job of demonstrating this.)
Track your progress with Gravitus
Download Gravitus to log your workouts, track your progress, and join a community of fitness enthusiasts.
Helpful Resources
One Rep Max Calculator
Find your one rep max for any exercise without maximal testing. Essential for developing effective strength training programs.
Calculate 1RMWorkout Programs
Follow structured workout programs created by fitness professionals to maximize your strength and muscle gains.
View Programs